Monday 9 September 2013

On the bench

For a while now, I've had a couple of 7" by 7" by 7'6" softwood timbers sitting in the back garden generally getting in the way, waiting for a project to come along. Originally they were purchased locally via eBay for use as posts for one of the gates in the woodland, however I managed to source some decent galvanised gates cheaper than a set of softwood ones, therefore these sat to one side, reminding me that a use for them must be found!


Upon the northern side of Badger's Holt, we have a sizeable area which is to be maintained as a fire-break between the woodland and the adjacent farm which we call 'The Meadow'. It's not really much of a meadow in the true sense of the word, its more an area of the land which wasn't planted with trees and left to go fallow. It's heavily rutted and overgrown with a multitude of grasses around 2' to 4' high in places with brambles tucked away into the north western corner. Along the northern boundary there are two old ash trees which have suffered disease and/or lightning strikes in the past, and now the barren branches provide suitable perches for the pair of buzzards often seen. A scattering of hawthorn, elder and blackthorn bushes form a partial boundary between both ash trees, and provide a source of food and shelter for the badgers which live in an extensive sett which occupies an area of around 100 metres by around 25 metres at its widest point. Maintaining the Meadow as a fire break is not an issue for us as we plan to cultivate this area (to a degree at least) in the next year or so so that we can have a decent size parcel of land to grow fruit and vegetables for our own use, and maybe for bartering if the opportunity arises. Gem has plans for a sizeable part of this area to be turned over to the production of potatoes and carrots on a rotation (Porter has a two furrow plough which should be able to turn the sandy soil with ease, we just need a rotavator and cultivator and we should be all set), whilst I have been harbouring a desire to plant a few apple trees against our boundary with the farm, with maybe a couple of rows of hops if the location proves to be suitable.

Anyway, I digress...
The one outstanding feature of the Meadow which makes it such a highlight of Badger's Holt has to be the view:


The morning after the first night I slept in the wood, I made myself a mug of Oxo on the embers of the dying fire and wandered out through the trees towards the blazing sun until I reached the edge of the meadow, where I sat in the very spot above, for an hour or so marvelling at aerobatics of the two buzzards soaring over the valley below. After spending many hours in this spot since, it seemed only fair to create a path to it along the verge of the woodland and install my very own perch....

The construction of the bench was really quite straightforward; The cross section of the post being 7", my plan was to have two posts side by side laid horizontally, making the thickness (depth) of the bench 14", with a total height of 21" from the base of the foundation which was to be made from sections of the posts. I cut 14" off each end of both posts, which provided four 14" by 7" blocks to bear the two seat beams.


Once everything had been cut and transported down to the woods, I needed to strim a decent pathway to get the materials to where they were needed through the undergrowth.


Unfortunately, there is currently no tractor access to this part of the woodland, so Porter took a well deserved rest:

As you can see, it looks exactly how you'd expect a field which hasn't been mowed in fifteen years to look!


Once I'd strimmed out a path and identified any potentially ankle-twisting ruts, I brought up the materials and began to sink the two bearing blocks into the sandy soil to around 4" below ground level. Based upon my previous experience when excavating post holes earlier in the year, this was completed in a jiffy.
Once I was certain the bearing blocks were even and level, the simple building-block construction rattled on towards completion:


As you can see, it was a simple and straightforward project. The majority of the graft involved with this was carrying the materials through the woodland to the site, and cutting the beams to size. In future I may drill down through the beams and into the uppermost blocks on both size and drive a dowel in to prevent any movement, but to be honest the weight is sufficient that I think it'll hold as it is.
A simple tidy bench built from £15 worth of fence posts.....


Sunday 8 September 2013

Hop Growing 2013

Although not a directly woodland-related post, hop growing has been something that has interested me for a while since becoming a home brewer. I pride myself on the fact that I brew my own ale outdoors (weather permitting) using only British hops, malted barley and Severn-Trent's finest H20 to recipes that are either my own creation, or inspired by ales that I know and love. Whilst I don't plan to grow and malt my own barley (not just yet at least), I have quite grown fond of the idea that I'd like to grow hops within areas of Badger's Holt that provide the right growing conditions to suit.

Before I jump feet-first into hop growing I thought I'd get the ball rolling by dipping my toe a little by growing a small selection of my favourite varieties in my own back garden, and as a result, this post explores my experience in this little foray. I also hope that this post will help my Antipodean brethren; Mr Nick Simmons, with whom I studied/drank with at university, to grow hops down-under.

Back in late March, I placed an order with the good folks at Castle Farm Hop Shop; http://www.hopshop.co.uk/, for three hop rhizomes; one each of Fuggles, Wye Challenger and East Kent Goldings. Within a week they had been delivered and were subsequently stored in the fridge until the weather permitted planting. In the interim, I trawled the forums such as www.thehomebrewforum.co.uk and www.jimsbeerkit.co.uk to soak up as much knowledge as I could about the care and maintenance of these wonderful plants.

Whilst I didn't take any photographs of the hop rhizomes in their dormant state, they don't look too dissimilar to a strawberry plant by virtue of the fact that all of the energy required to kick-start the plant on it's journey to production is stored within a small mass of long hairy roots. The root system which develops from the rhizome does reach quite a depth, and will eventually spread laterally as well, hence why they prefer deep and well drained soils.

In order to provide my plants with the very best start, I excavated a hole around a spade's width and depth, and mulched in some freshly rotted manure into the base of the hole, before carefully placing each rhizome into their respective holes and back filling with soil. Within two weeks, my initial work had been rewarded with the sight of leaves! (Please excuse the poor state of the soil: its not the best available in South Derbyshire.)


As time passed, the hops began 'searching' for a substrate to climb. In normal circumstances, the hop shoots are trained vertically up lines of twine which are attached to frames constructed of chestnut. Unfortunately, my garden is compact and bijou, so I couldn't get away with a network of hop poles and twine, so I had to settle for the following configuration (shown in late June)

In order to achieve maximum growing space, I installed two lines of twine at approximately 45 degrees from each plant in both directions, halfway along which, I added a short line perpendicular to the main line to add more space. In hindsight, I could have added more lines between and the hops would have easily taken to them and possibly provided more cones.In some cases, the hops grew beyond the length of the twine, and had to be looped back upon themselves which created very bulky hop vines. In the case of the East Kent Goldings, they eventually grew so far that they made good use of the trellis atop the fence along one side of the garden.

It should be noted that the hop shoots are to be trained clockwise around the twine, and it makes sense to do this every couple of days as my hops were growing around 1"-2" per day, and come early August, the hops plants were starting to show a fair amount of small young cones:
At this point in time, the weeks seemed to flash past and the hops really started producing an abundance of cones on all plants, with Fuggles the clear heavy-cropper, followed by East Kent Goldings and Wye Challenger in a close third.


Fast-forward to September 7th; Harvest Time!

Once a reasonable period of dry weather has played out, and the hop cones start to feel light and papery as well as exhibiting a slight tinge of brown with bright yellow Lupin (a pollen-like powder) within, they are ready for picking.


I chose a warm afternoon at the outset, which quickly turned to a thunderous downpour by the time I was picking from the last plant, but it made little difference to my mood as I was grinning from ear to ear when the Fuggles plant produced two full-sized punnets like this.


My green/wet weights for this years harvest were:

Fuggles: 547 grams 
East Kent Goldings: 447 grams
Wye Challenger: 345 grams

Based upon an 80% loss of mass upon drying, this should provide me with the following dry weights before storage;

Fuggles: 109 grams 
East Kent Goldings: 89 grams
Wye Challenger: 69 grams

Once picked, I readied my drying rack ready for drying in the Oast House (read; loft).

I picked these trays up off eBay (again), for a couple of quid each if I remember rightly. They tend to be used for chitting seed potatoes, but they're ideal for drying onions and garlic once picked, so I see no reason why they won't work for drying hops.


Once picked, I spread the hop cones out evenly over the base of each tray, shortly before labelling them and stacking them ready for taking up to the loft.

With any luck, after a week of drying with a gentle shake to turn the cones over every day, I should have hops ready to brew with. I'll keep you posted with Part 2 in the next few weeks.....The brew day!

Sunday 18 August 2013

Porter


Apologies for the rather retrospective nature of the blog posts so far. It was my intention to start a blog from week one of June, but as I'm sure you can appreciate, the work pretty much overruled this idea. What I'm attempting to do is condense the past few months into a few salient blog posts to give a good idea of what has been happening to date, and then update as and when something exciting happens, or something useful can be shared.

Anyways, here's a little info on Porter, for those who'd like to know.


Porter is a 1954 Ferguson TED20 tractor, powered by a four cylinder Standard engine which can be run on Petrol or TVO (vapourising oil). Porter was originally supplied to a farmer in the Hamlet of Martin near Woodhall Spa, Lincolnshire by Boston Tractors and was used in an orchard and an adjacent woodland for various uses and had a rather hard life having had a new engine and gearbox at some point, before being abandoned in a hedgerow.


The tractor was purchased from the original owner and restored by its previous owner, to its current condition and was used predominantly for showing and light ploughing duties. Here are a few snaps of before/during restoration.


I decided I needed a tractor, having brushed-off the idea of doing all of the work using an old Land Rover with a winch as being too costly. I'd also dismissed the concept of a tracked unit for moving logs on the grounds of versatility; so a tractor it was to be!

The Ferguson TE20 came in a number of guises centred around intended use and fuel type, but all were suited to the Ferguson range of implements, of which I might add, there are/were many. Porter in fact came with a two furrow mouldboard plough, which may see use in the future depending upon the fate of the meadow. I swiftly made a complimentary purchase for Porter, namely a rear transport box which can be seen in use here;


Whilst Porter is certainly not up to concours standards, he is in good nick, both mechanically and cosmetically speaking, however that wasn't the case when he arrived. Initially the starter solenoid wasn't functioning correctly (the TE20 series of tractors started by means of a sixth 'starter' gear which actuated a small switch in front of the centre console), so Porter had to be started by shorting the terminals with an old set of pliers, which was er....'fun' to say the least. The fuel wasn't particularly clean either; the petrol tank is split into two compartments, the largest of which contains the TVO, however it was full of rust so it needs to be stripped and re-sealed at some point. I've already had the carburettor stripped and rebuilt (for less than the cost of parts to do it myself, which was a bonus), and the spark plugs have been replaced for a fresh set of NGK's. I'm still not happy with tick over, but I'm sure smooth running will come in time, especially once I've got a new distributor cap and a couple of gaskets for the manifold.

Anyways, that's about all I can tell you about Porter at the moment, I'll leave you with a few more pics of him in all his glory:

 And I couldn't resist one of Evelyn 'The gaffer'.


Saturday 17 August 2013

Erecting a 'post and wire' fence


As part of the legal obligation of the purchase of the land, we needed to erect approximately 250 metres of post and wire fence along the longest boundary (sods law eh!?) to the south and south west of the wood, within two calendar months of the purchase date. Initially, I'm happy to admit that I was very daunted by this prospect as 250 metres of fencing is no mean feat, even to an experienced fencing contractor. Whilst I consider myself a reasonably practical kinda' chap, this project was well out of my comfort zone, and it had to be done right-first time, and rapidly. We were aware of this obligation from the outset, as this stipulation was made within the sales particulars, which gave me plenty of time to do the sums and research.

Initially I looked at paying a local fencing contractor to do the works, but unfortunately quotes came back at around £8 per metre, which was to supply and fit high-tensile galvanised steel wire to softwood treated posts. All-in, therefore, the cost of the fencing would work out at £2000. Based upon this figure, I didn't even bother asking for quotes to supply and fit sweet chestnut fencing, which was my preferred choice for ethical, environmental and maintenance reasoning.

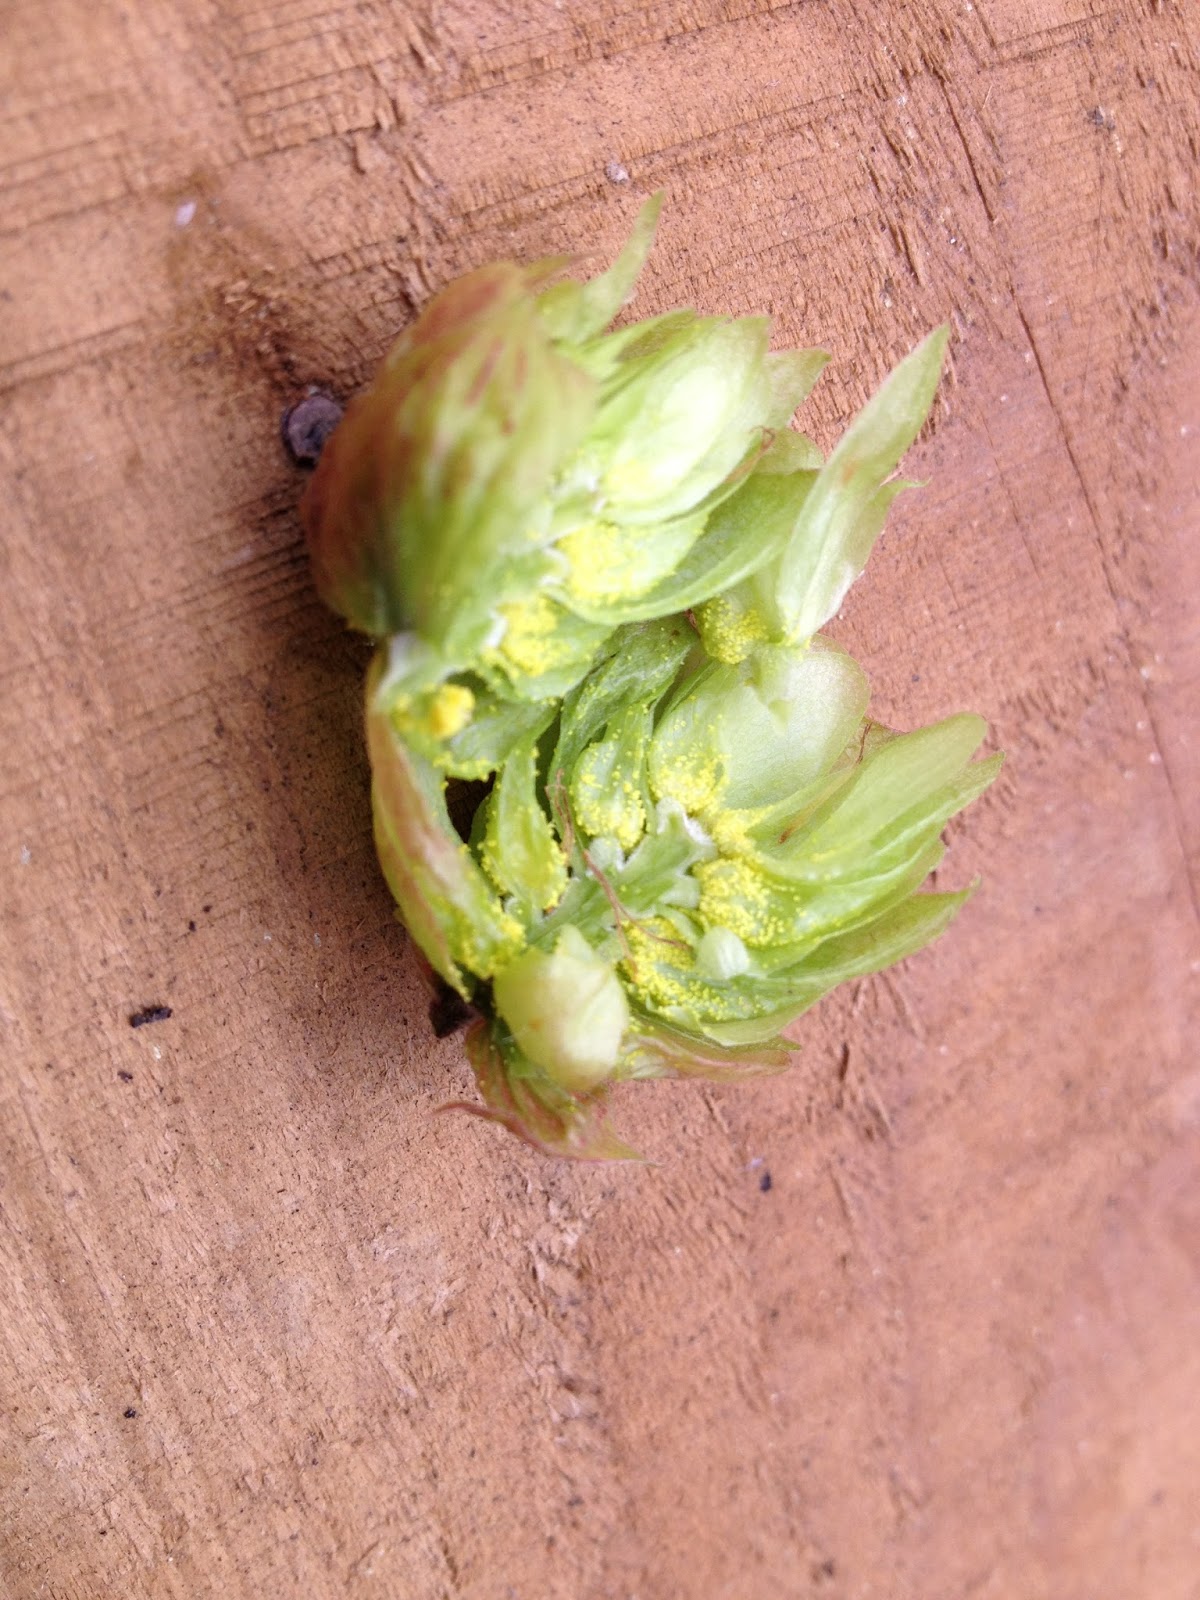
Sweet Chestnut (Castanea Sativa to give it its correct Latin nomenclature) is not an indigenous species to the UK, having been introduced by the Romans, but it is prolific in the south east of England where it has been coppiced for centuries to produce poles and stakes for Hop production. The reason why Sweet Chestnut is so desirable for fence posts etc, is its resistance to decomposition when in contact with the ground due the tannins within the wood. In fact, Sweet Chestnut has a comparable tannin content to Oak, which is obviously considerably more expensive and generally harder to coppice. The premise of this post and wire fence is to provide a degree of stock-proofing to the land, whilst also providing a strong, flexible boundary line to demark the edge of the plot, as cheaply as possible. Unless the ground is particularly soft, this type of fence should require nothing other than the wooden posts and the wire between, which means that concrete is not used.

With my mind already made up for me to 'DIY' due to the costs of contracting the work, I set about obtaining quotations for supply and delivery only of the following:
11 No 6" Diameter 7' Peeled & Pointed Strainer Posts
25 No 5" Diameter 7' Peeled & Pointed Struts
140 No 4" Diameter 5'6" Peeled & Pointed Intermediate Stakes

The most favourable quotation for all of the above came from CWP Fencing (http://www.cwpfencing.co.uk) at just shy of £675 delivered to Derby from Ashford, Kent. An order was placed, and withing a week the back garden was full of chestnut posts ready to be ferried down to the woodlands as required.


I took a week of work inJune to begin the fencing, joined on alternate days by Gemma, Mark and my folks to assist me with the fencing or provide tea. Without this help and support (and a huge bowl of porridge every morning), I can safely say that the fence would not have gone up so quickly, if at all!


The erection of the fence begins by installing two of the larger 'Struts' braced with a 'strainer' towards the top, at each end of the fence line. Each of the struts are placed into a post hole which has been dug to a depth of three feet into the soil/rock and backfilled with whatever arisings created from the excavation. These strut and strainer combinations are called 'box strainers' and should look something like this;

We were rather fortunate that the exact changes in direction of our boundary had been marked out by a land surveyor before beginning the fence by means of a number of 3' long by 2" square stakes. I was personally quite keen to get these stakes replaced with the vertical strainer posts as quickly as possible because of the potential for these to be removed with ease if anyone toook umbridge to the woods being carved up and sold-off. Where there is a proposed change in direction of the fence line, a single strut is installed rather than a box strainer. The strut is the braced by roughly morticing two strainers approximately one third to half-way between ground level and the top of the post like so:

The strainers are aligned along the course of the fence, therefore it's prudent, although not essential, to use a string line to assist when doing this:
Once you've mortised the point end of the strut into the strainer, and aligned the blunt end with the direction of the fence, a narrow trench must be dug to accomodate the end of the strut. The trench need only be a spade's with, and around 8" deep at most; the end of the strut is then placed into the base of the trench. Whilst taking a break from mortising the strainer posts to accomodate the struts, a stob was fashioned from the end of a 4" intermediate post, to a length of 2' or so. This stob was offered up to the base of the strut and driven into the ground at an angle to provide a solid foundation for the strut to brace against (apologies for my crappy sketch):
After digging the first couple of post holes through reasonably easy sand, I was gutted to encounter 'hard as nails' Sandstone (yeah, that's an official geological term). It took some hellish work in the blazing sun to advance into this stuff and get all of the box strainers, directional strainers and struts into place. Having got them all into place, the next step was to install the bottom wire. I opted to use high tensile galvanised wire upon recommendation from a few folks, not to mention a good friend of mine; Craig Dasilva. It was an absolute sod to work with as my buddy Mark found out when helping; the wire takes every opportunity to twist itself around like an eel, but once its taught it wont stretch much! When it comes to fixing the wires around the box strainers (i.e. tying-off the wire) I initially started by using knots which I learned here from this guy in New Zealand (via Youtube);
Post and wire fence tips.
Once one end of the fence has been tied-off around a box strainer, a monkey strainer can be used to tighten the wire before tying another knot. Whilst the guy from NZ makes it look easy, it really isn't! My knots looked awful, so I ended up purchasing some Gripples, which are essentially a small non-return device which slides onto the wire and grips by means of a cam. Much quicker and easier, and holding firm so far!!

At this point, the most laborious task was upon us: knocking in the intermediate posts. This basically involves installing a post every 2.5 metres by way of knocking them in with a post rammer. The rammer is a simple tool, comprising a section of steel tube of 6" diameter by 3' long, with one end blanked off and two handles welded to the sides. Mark and myself took it in turns to do the donkey work, whilst the other checked the post was going in straight. Surprisingly, we did it in no time at all considering the heat we were working in and the overall length of the fence! Because we were on a bit of a roll at this point, the second length of wire went up before sunset as well:


In the last photo, you may notice the addition of a little grey Ferguson tractor, which arrived midway through the works. Sadly it was too late for the bulk of the hard work, but 'Porter' was still able to help with hauling large numbers of intermediate posts up to the top of the woodland. More info to come later in the year...

Right, back to the fencing.

Now both the upper and lower wires were in position, all that remained was the addition of three further wires to finalise it, as well as the temporary erection of the gateway fence and gate posts. The three wires were installed as per the first two and then tacked into position utilising staples. It is important not to drive the staples all the way into the posts, thereby nipping the wire, as the wire needs to be able to run freely to allow for expansion and contraction. If the wires are abraded by the staples, they will eventually lose the galvanised coating, thereby prematurely rusting the wire.

That's about it for the fencing to be honest. The next project will be purchasing and installing the gates! I'll leave you with a photo of the fence in its completed state:


Sunday 11 August 2013

Beginnings.

"As an ook cometh of a litel spyr"


I wanted to begin a blog about my experiences of woodland ownership way back in the late Autumn of 2011, when my wife and I first began to seriously consider purchasing woodland. Of course, back then, there seemed to be an innumerable amount of obstacles to block the path to our intended goal; such as building a deposit, securing further finance, choosing a solicitor, finding the land, making an offer etc. At the time the list seemed endless, and almost every conversation we had about woodland began with "If we're ever lucky enough to buy woodland....". The future seemed so uncertain, not only because the recession had bitten deep and money was not readily available as it was pre-financial crisis, but also because little information in the form of blogs, websites etc were available that documented woodland ownership from conception to management and beyond.

In the beginning, we found a brochure from an agent in the midlands advertising a four individual woods, the smallest of which was fourteen acres. We valued the land, by comparison with other woodlands around the country, at £4000 per acre and made a bid for seven acres. After much to'ing and fro'ing, we settled on a three and a half acre section of one of the woodlands at nearer £5000 per acre, and felt a little sore to say the least. The agent and the vendor seemed in no rush to negotiate or communicate with us, and generally projected the feeling to us that the sale was an inconvenience. Fair enough! Looking from a different angle than our own, they were the vendors and it was their land, therefore they could do as they wished. In this world, those with the money/assets can do or act as they please, or that's the way it seemed.

The initial sale negotiations drew to a close and the solicitors were 'given the nod' to begin drawing up contracts in June, approximately four months since we first saw the brochure. The first draft of contracts arrived a couple of weeks later (our solicitor was very good at her job!) but we noticed a clause stating that we were responsible for paying the vendors fees; nearly £500! This was the penultimate nail in the coffin of this particular negotiation, and we decided to hedge our bets and look elsewhere whilst still progressing, at a diminshed pace, with the sale.

Within a couple of days we had found and planned a visit to see another wood, a little further away to the south of Derbyshire, not far from Swadlincote, within the National Forest. On paper, the woodland looked a bit lacking if I'm brutally honest. It had been planted as part of the National Forest woodland creation scheme back in 1998 and was comprised of blocks of species with a mixture of sixty percent broadleaf and forty percent coniferous and was lacking any form of topographic feature. It wasn't great, but it was reasonably priced.

Upon setting foot upon the land, I can safely say we had no 'thunderbolt' moment that others speak of; there was no sense of feeling 'right' or belonging, just a feeling of calm and the smell of woodland and grassland in equal measure. As we investigated further, we noticed a parcel of 4.5 acres which contained about half an acre of grassland, situated atop a sandy bank (complete with huge badger sett and rabbit warren, overlooking a shallow valley and farmland below.....This was to become 'it'.....Badger's Holt Wood.

Negotiations began and a deal was struck that was both favourable and rapid, and the agents of the first plot were politely informed where to get off. Recalling from memory, I think the whole sale negotation period for Badger's Holt lasted less that three weeks, I wish the same could have been applied once terms had been agreed!

From August, up until completion at the end of May the following year a lot happened, but given the time scale it seemed to drag considerably, mainly due to the nature of the purchase, whereby a larger wood was being fragmented and sold off. Searches and access permissions took longer than normal, and the contracts were written, re-written, and re-written several times more. At first it seemed that despite a clear field entry from a farm track to the wood, we were only at liberty to cross the access on foot or by horse!! However our excellent solicitor advised us to pursue vehicular access for 'Forestry, Agricultural and Amenity' purposes, which was finally agreed by the vendor. Further complcations arose when our initial woodland mortage offer expired and had to be applied for in full again, but fortunately our solicitor and the wonderful folks at Ecology sorted this in short order. Completion and exchange of contracts came in the last week of May, and the fun began in earnest the following weekend.